Connect and Create
Make Up Artist - Stephanie Bottrell
What made you start a make up page on Instagram?
Ever since I was 16 I had a passion for doing makeup and after many years of practice I decided to post my looks on Instagram to share with fellow makeup lovers. I get a lot of my inspiration from other Instagram makeup pages.
Tell us what you love about make up and cosmetics?
For me, makeup is a form of art. It’s so much fun for me. When I’m doing someone’s makeup it doesn’t feel like work to me and many people can’t say that about their jobs. It’s almost therapeutic to apply makeup to myself and others. I love how you can switch up products to create different looks from a natural simple everyday look to a dramatic contoured “going out” look. I love trying out different combinations of colours to see what colours work nicely together and for different eye colours and skin tones. I get so much satisfaction out from making people feel beautiful and confident. As much as I love makeup, it’s only makeup and washes off at the end of the day. I appreciate a bare face and think everyone is beautiful with and without it.
Tell us what contouring is and how we would go about this?
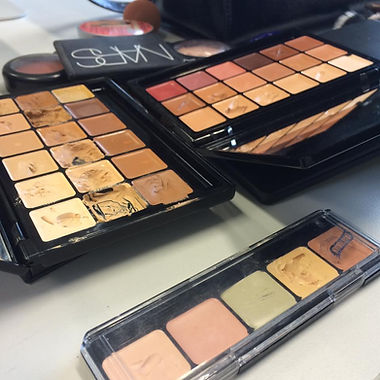
Contouring is the use of a dark and cool toned brown makeup product to sculpt out the face to give it a more chiseled and defined look. The applied product is used to replicate shadows on the face. The product can be in cream or powder form. Contouring is usually paired with highlighting which is the opposite; a lighter coloured cream or powder to highlight and bring forward features of the face. It’s so important that the contour colour is cool toned and matte not warm or shimmery. I would apply a stripe of the contour product just under the cheekbone along the hollows of the cheek down toward the corner of the mouth. A stripe along the jaw line to define the jaw and to minimize the appearance of a double chin. A thin stripe along the sides of the nose for the illusion of a straight and petite nose. A bit of product under the lower lip. The most important step is to blend the contour out so it doesn’t look harsh. I would then apply highlight on top of the cheekbones, down the center of the nose, the brow bone and the cupids bow.
You’ve recently done some make up for fashion events? How were those experiences?
Yes, I did make up for the models at the Peel st block party earlier this year. That was a valuable experience which allowed me to develop my time management skills in doing quick and bold makeup for a number of models in a small time frame. I got experience in doing makeup for a variety of different skin tones. The most important thing I gained from doing the makeup for the event was meeting the lovely models and other makeup artists and getting to know them.
Melbourne is such a creative city. What kinds of projects would you like to aspire to be apart of in the future?
I agree. Melbourne and its people have a wonderful appreciation for all forms of art. I would love to be a part of more fashion events in future. I love doing makeup for runway and editorial shoots. Eventually I’d love to work as a professional makeup artist for runway during Melbourne Fashion week.
If you got to do make up for a celebrity who’s glam team would you like to be apart of?
I’d love to do makeup for Kylie Jenner. I think she has the perfect round almond eyes which can work with all sorts of eye makeup looks. Her skin is beautiful so foundation would sit nicely. Her face structure is the perfect shape to experiment with. I love her style in general, she always looks so glamourous and flawless.
Take us through the make up process for you ? (going out and day to day)
Day to day
1. Apply moisturizer to freshly cleansed face
2. Spread primer around the face focusing on areas with uneven texture. Primer will make foundation apply smoothly and make the makeup last longer.
3. Apply tinted moisturizer all over the face (I like to use a flat top buffing brush to blend out in downward motions). Blend with a beauty blender sponge.
4. Apply concealer to under eyes and blemishes, patting the concealer rather than rubbing it will allow maximum coverage.
5. Set the base with a light translucent powder.
6. Apply bronzer with a big fluffy brush lightly along the cheeks, nose and temples to add dimension and warmth to the face.
7. Lightly fill in any gaps in the brows with brow powder, extend the tail slightly. Blend at the inner brow for a more natural look.
8. Apply your favourite waterproof/ smudge proof mascara to top and bottom lashes
9. Apply tinted lip balm/ a “my lips but better” lipstick colour
Going Out
-
Repeat steps 1 & 2 as above.
-
Start eyes first so eyeshadow fallout doesn’t ruin the base. Apply eyeshadow primer all over the lid and along the lower lash line to prevent creasing and fading.
-
Apply a medium warm toned brown shade along the crease of the eye socket with a large fluffy brush
-
Apply a darker shade in the crease and the outer third of the eyelid with a smaller domed crease brush and lightly blend out for a smoky effect. Apply any lid colour of your choice to the lid and blend in with crease colours. Apply cream eyeshadow to brow bone.
-
Apply dark brown/ black pencil to inner water lines. Apply liquid liner to top lash line and wing out.
-
Apply mascara and false eyelashes (wait for lash glue to get tacky ~30 seconds before applying lash)
-
Blend eyeshadows to lower lash line to intensify smoky effect.
-
Wipe away any fallout and move onto base. Apply full coverage foundation all over the face blending with beauty blender sponge. Apply concealer to under eyes in a triangle shape to highlight inner part of the face. Blend concealer up and out along cheekbones. Set base with a full coverage powder for flawless finish.
-
Contour and highlight following the process described above.
-
Apply blush of your choice on the outer part of the apples of your cheek blending up and out for a lifted look.
-
Apply shimmer highlight along tops of cheekbone.
-
Apply Lipliner and lipstick/lipgloss
You get a lot of freebies from brands. That must be exciting part of the job yes?
Yes I get so excited when new products come in the mail! I love trying and testing out new products for review. I will always give an honest opinion of the product on my blog. I don’t believe in giving positive feedback on a product if I don’t like it, even if it jeopardizes me getting sent products in future. I know a lot of people abuse the privilege of receiving free product and write a positive review even when the product itself isn’t quality.
What advice would you give to someone who wants to get into Beauty Blogging?
I reckon you should just go for it! You have nothing to lose. If you love beauty and trying different beauty and makeup products definitely start up a blog/ Instagram. It’s a wonderful to share your passions and interests with other people who are also passionate about beauty. You never know what opportunities may come from it.
Your top 5 products that are a must have for any girl?
-
Nars radiant creamy concealer is my favourite concealer. Full coverage and very blendable and doesn’t crease under the eyes. Available in a wide range of skin colours.
-
Smashbox photofinish primer makes foundation apply so smoothly onto the skin and prevents fading throughout the day.
-
MAC soft and gentle highlight is absolutely gorgeous on the cheekbones!
-
Urban Decay Perversion mascara is amazing; smudgeproof and the blackest mascara I’ve ever tried
-
Benefit Gimmie Brow coloued brow gel is amazing for a quick every day brow fill in. It also contains littel fibers which cling to the brows for a fuller brow look.

photo by @glambottz